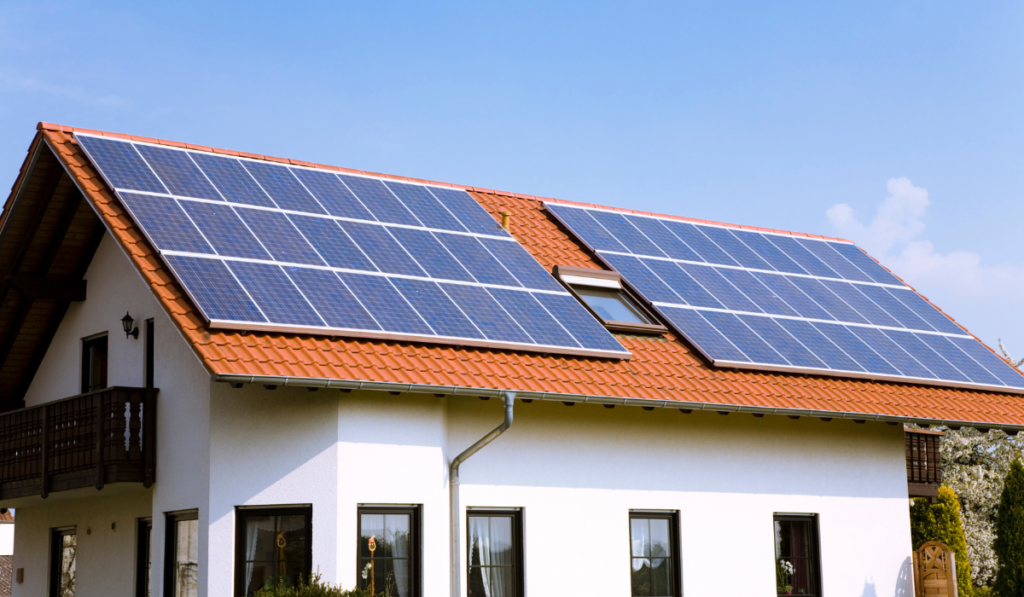
Setting up an off-grid solar system allows you to generate your own electricity, making you independent from the power grid. In this guide, you’ll learn everything from calculating your energy needs to choosing the right components and wiring them safely. We’ll also cover practical tips, common mistakes to avoid, and how to ensure your system runs efficiently. Whether you’re powering a remote cabin or preparing for emergencies, this step-by-step guide will help you build a reliable solar setup from scratch.
Step 1: Calculate Your Energy Needs
The first step in setting up a solar power system is to determine your energy needs. Begin by listing all the appliances and devices you plan to power, such as lights, a refrigerator, phone chargers, and fans. Each appliance has a specific wattage, which can usually be found on its label or in the manual. Knowing the wattage helps you estimate how much energy each device consumes daily.
Understanding the Calculation
To calculate daily energy usage, use this simple formula:
Wattage × Hours Used Per Day = Daily Energy Consumption (in watt-hours or Wh).
For example, if you have a 50-watt fan that runs for 8 hours a day, the calculation would be:
50W × 8 hours = 400Wh/day
Repeat this process for all appliances and add up their total daily energy consumption to get an overall estimate.
Adding a Buffer
To ensure your system is reliable even on cloudy days and to account for energy losses, it’s important to add a buffer. Multiply your total daily consumption by 1.3 to create a safety margin. This ensures your system has enough power to function smoothly under less-than-ideal conditions.
For the most accurate results, consider using a Kill-A-Watt meter, which measures the actual power usage of your appliances. This can help fine-tune your calculations and provide a better estimate of your energy needs.
Step 2: Choose Your Components

Once you have calculated your energy needs, the next step is selecting the right components for your solar power system. Each component plays a crucial role in ensuring efficiency and reliability.
Solar Panels
There are two main types of solar panels: monocrystalline and polycrystalline. Monocrystalline panels are more efficient and space-saving, making them ideal for limited spaces. Polycrystalline panels, on the other hand, are more budget-friendly but slightly less efficient.
To determine how much solar panel wattage you need, use this formula:
(Total Daily Wh ÷ Sun Hours) + 30%
For example, if your daily energy consumption is 3,000Wh and you get 5 sun hours per day, the calculation would be:
(3,000Wh ÷ 5) × 1.3 = 780W of solar panels needed
Charge Controller
A charge controller regulates the power going from the solar panels to the batteries. There are two types:
- PWM (Pulse Width Modulation): More affordable and suitable for small systems.
- MPPT (Maximum Power Point Tracking): More efficient, especially in cloudy conditions or colder climates.
Batteries
Batteries store energy for use when the sun isn’t shining. The two main types are:
- Lead-acid: Cheaper but requires regular maintenance and has a shorter lifespan.
- Lithium: More expensive but lasts longer and requires little maintenance.
To calculate battery capacity:
(Total Daily Wh ÷ Battery Voltage) × Days of Backup
For example, if your daily use is 3,000Wh, you use a 12V battery, and you want two days of backup, the required battery capacity would be:
(3,000Wh ÷ 12V) × 2 = 500Ah of battery storage needed
Inverter
An inverter converts stored battery power (DC) into usable electricity (AC). Choose between:
- Pure sine wave: Safer for sensitive electronics but more expensive.
- Modified sine wave: Cheaper but may not work well with some appliances.
To size your inverter, take the total wattage of your appliances and add a 25% buffer for surge power.
Other Essential Components
- Mounting Gear: Decide between roof, ground, or pole mounts based on your setup.
- Wiring & Safety: Use MC4 connectors, fuses, circuit breakers, and a proper grounding rod to ensure safety and efficiency.
Always oversize your solar panels and batteries by 20–30% to account for energy fluctuations and unexpected power needs. A slightly larger system ensures reliability and long-term efficiency.
Step 3: Find the Perfect Location
Choosing the right spot for your solar panels is crucial to getting the most energy from your system. The goal is to maximize sun exposure and avoid anything that could block sunlight.
First, make sure your panels get full sun exposure throughout the day. Shade from trees, buildings, or other obstacles can significantly reduce efficiency. Even a small amount of shading can impact the entire system’s performance.
Next, consider the tilt angle of your panels. A good rule of thumb is to match your latitude. For example, if you live in Texas (about 30° latitude), setting your panels at a 30° angle will optimize energy production. If possible, adjust the tilt seasonally—steeper in winter to capture more sunlight and flatter in summer to maximize efficiency.
The direction your panels face also matters. In the Northern Hemisphere, panels should face south to receive the most sunlight throughout the day. In the Southern Hemisphere, they should face north for the same reason.
To make things easier, consider using a solar pathfinder app like SunSurveyor to track the sun’s movement in your area. This helps you find the best placement for maximum energy production.
Step 4: Install Solar Panels

Now that you’ve chosen the perfect location, it’s time to install your solar panels. Proper installation ensures your system is secure, efficient, and long-lasting.
Start by mounting the racks that will hold the panels. Whether installing on a roof, ground, or poles, make sure the racks are firmly secured using stainless steel bolts. If you’re mounting on a roof, ensure the structure is strong enough to support the weight of the panels.
Next, attach the solar panels to the racks. Bolt them securely in place, leaving 2–3 inches of space between panels to allow for proper airflow and prevent overheating.
For roof installations, weatherproofing is essential. Any holes drilled into the roof should be sealed with silicone caulk to prevent leaks and protect against water damage.
Safety First
- Always wear gloves and safety glasses while handling solar panels.
- If working on a roof, use a safety harness to prevent falls.
- Be mindful of electrical components and follow proper installation guidelines.
Taking the time to install your panels correctly will ensure they work efficiently and remain durable for years to come.
Step 5: Connect Components

Once your solar panels are installed, the next step is wiring everything together. Proper wiring ensures your system runs efficiently and safely.
Connecting Solar Panels to the Charge Controller
Start by wiring the solar panels to the charge controller using MC4 connectors, which make the process simple and secure. Depending on your system, you can wire your panels in:
- Series – Increases voltage, ideal for long-distance wiring.
- Parallel – Increases current, useful for low-voltage setups.
Connecting the Charge Controller to the Batteries
Next, connect the charge controller to the batteries. Always match the polarity correctly:
- Red (+) to red (+)
- Black (-) to black (-)
For this step, use 10-gauge wire to handle the current safely.
Connecting the Batteries to the Inverter
Now, wire your batteries to the inverter using thick cables (4–6 gauge) to handle the power flow. It’s also important to add a fuse for protection—typically, a 100A fuse for a 1000W inverter is recommended.
Wiring the Inverter to Your Electrical Panel
- Turn Off the Main Power – Before making any connections, shut off the main breaker to avoid electrical hazards.
- Run Wires from the Inverter to the Electrical Panel – Use properly sized cables (typically 8-10 gauge for smaller systems, thicker for larger ones) to handle the power output.
- Connect to a Breaker or Transfer Switch –
- If you are tying your system into the grid, you’ll connect the inverter to a dedicated breaker in your main panel.
- For off-grid systems, a manual transfer switch can help switch between solar and backup power.
- Match the Voltage – Ensure the inverter’s output voltage (e.g., 120V or 240V) matches your home’s electrical system.
Safety First!
- If you are not comfortable working with electrical panels, hire a licensed electrician to make the final connection.
- Always ground the inverter to prevent electrical shocks or system damage.
- Double-check all wiring before flipping the breaker back on.
Common Mistake to Avoid
Reversing the positive (+) and negative (-) connections can damage your charge controller or other components. Double-check all wiring before turning the system on!
Step 7: Test the Electricity
Now that everything is wired up, it’s time to test your solar setup to make sure it’s working properly. A few quick checks will help confirm that power is flowing correctly and your system is running efficiently.
What to Check
- Charge Controller – Look for a green light, which indicates everything is functioning correctly. A red light or error signal could mean a wiring issue that needs to be fixed.
- Inverter – Plug in a small device like a lamp or phone charger to see if the inverter is providing power. If it works, your system is generating usable electricity.
- Battery Voltage – Use a multimeter to check the voltage. A fully charged 12V battery should read between 12.6V and 14.4V when charging. If the voltage is too low, the batteries may need more charging time or additional solar panels.
Troubleshooting Tips
- No Power? – Double-check all fuse connections and make sure breakers are switched on.
- Low Voltage? – If the batteries are not holding charge, they may need more sunlight, or you might need to add additional panels for extra power.
Once all components are tested and running smoothly, your solar system is ready to provide clean, renewable energy!
Essential Tools for Solar Installation

For a smooth and safe solar setup, you’ll need a screwdriver set, adjustable wrench, and drill for mounting panels and securing components. Wire strippers, pliers, and a multimeter are crucial for making proper electrical connections and checking system performance.
To handle wiring, use an MC4 crimping tool, wire cutters, and a crimping tool for lugs to secure cables. Safety gear like insulated gloves, safety glasses, and a harness is essential for protection. A fire extinguisher should always be on hand when working with batteries.
For mounting, stainless steel bolts, a silicone caulk gun, and a torque wrench ensure a sturdy and weatherproof installation. With these tools, your solar system will be installed efficiently and safely!
Final Thoughts
Setting up an off-grid solar system is like assembling a puzzle—every component plays a crucial role. By starting small and learning along the way, you’ll gain the confidence to expand your system and take full control of your energy needs. With the right planning and tools, achieving energy independence is within reach. Ready to harness the power of the sun? Let’s get started!
Hi, I’m Jon! I write about solar energy and make it easy to understand. My family runs a solar installation business, so I’ve been around solar panels my whole life. On my blog, I share simple tips, clear explanations, and helpful advice to help people switch to solar. When I’m not writing, I’m working with my family to bring clean energy to more homes and businesses.